What's New In The 3D Printer World

3 minutes reading time (520 words)
Featured 

Flashing Tronxy X5S Factory Control board USB Cable only

Ok so Scott here again, this time I decided to go ahead and take things to a simple level based off a write up done by Syed Muhammad Shaheryar. I have seen so many comments and issues with people flashing firmware to their factory TronXY X5S control board, now this should work for flashing the firmware on the X3S as well but the firmware I included will need some edit work unlike for the X5S. This Version of Arduino IDE will work just like any other but it can be installed on a thumb drive or SD card  and moved from one computer to the next without having to install anything on that computer. it should also work on other boards but I have not tested it.

To start with Items you will need.          


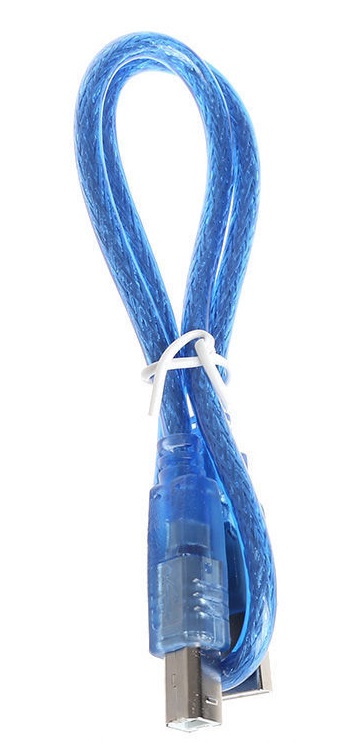
USB cable that came with the printer (or about any others that fit both ends)


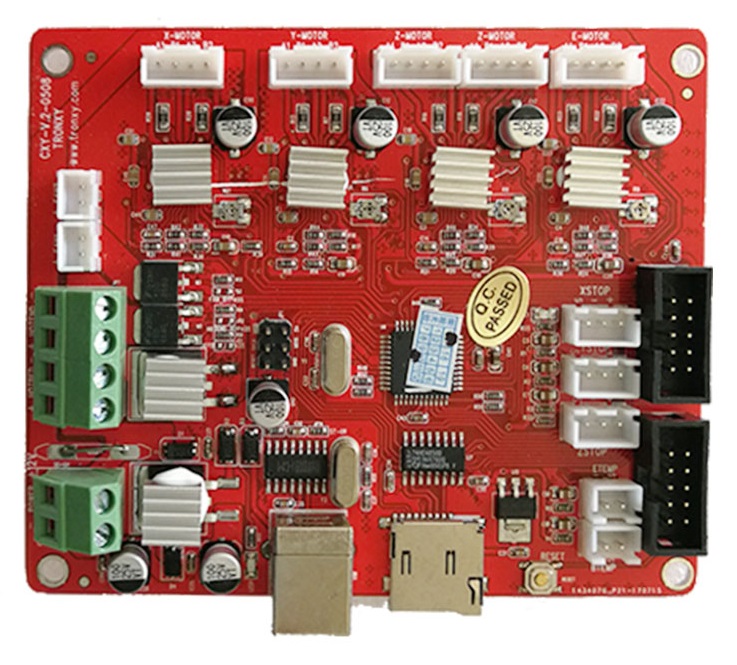
                Tronxy X5S factory control board.


  1. Remove all versions or Adruino IDE if you already have it installed. From this point on you can use this version for all your firmware updates.
  2. Download.

             Down load this zip (165.mb)

File is here

(note I got comments about people getting heating errors so I changed the firmware temp timer in the firmware in this file but it is only the firmware so you still need the above file first) Temp time extended firmware  File is here (please note I updated the first file to include this file as well so this is just here if you already have bootloader and want to use this firmware only)


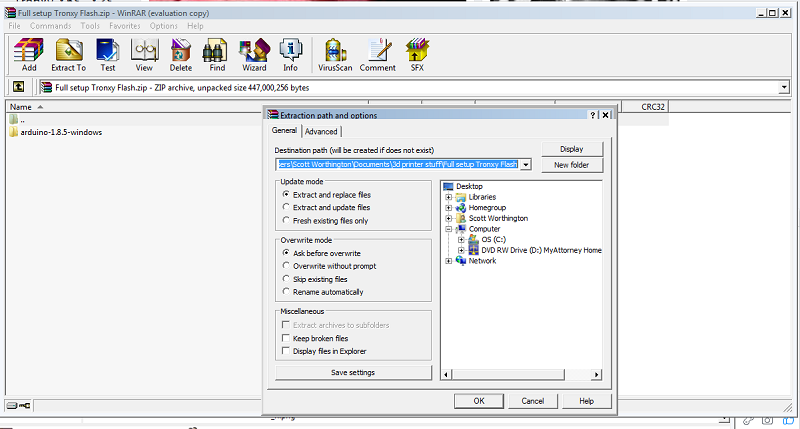
  1. Unzip the file in a location of your choosing. This will install a complete new version of Arduino that is stand alone.


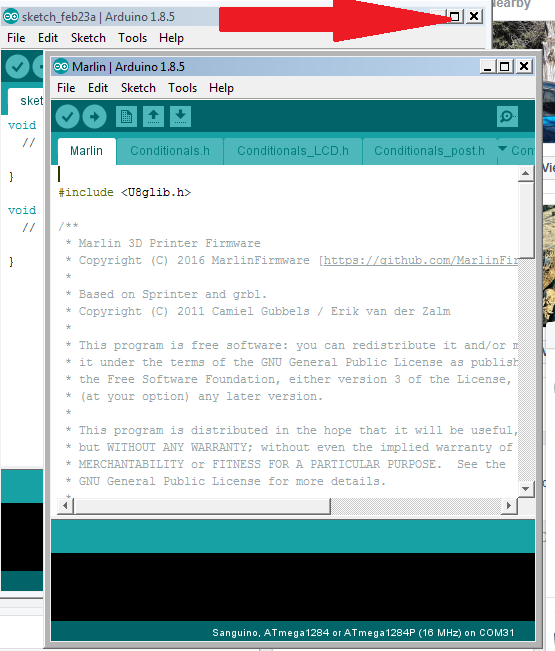
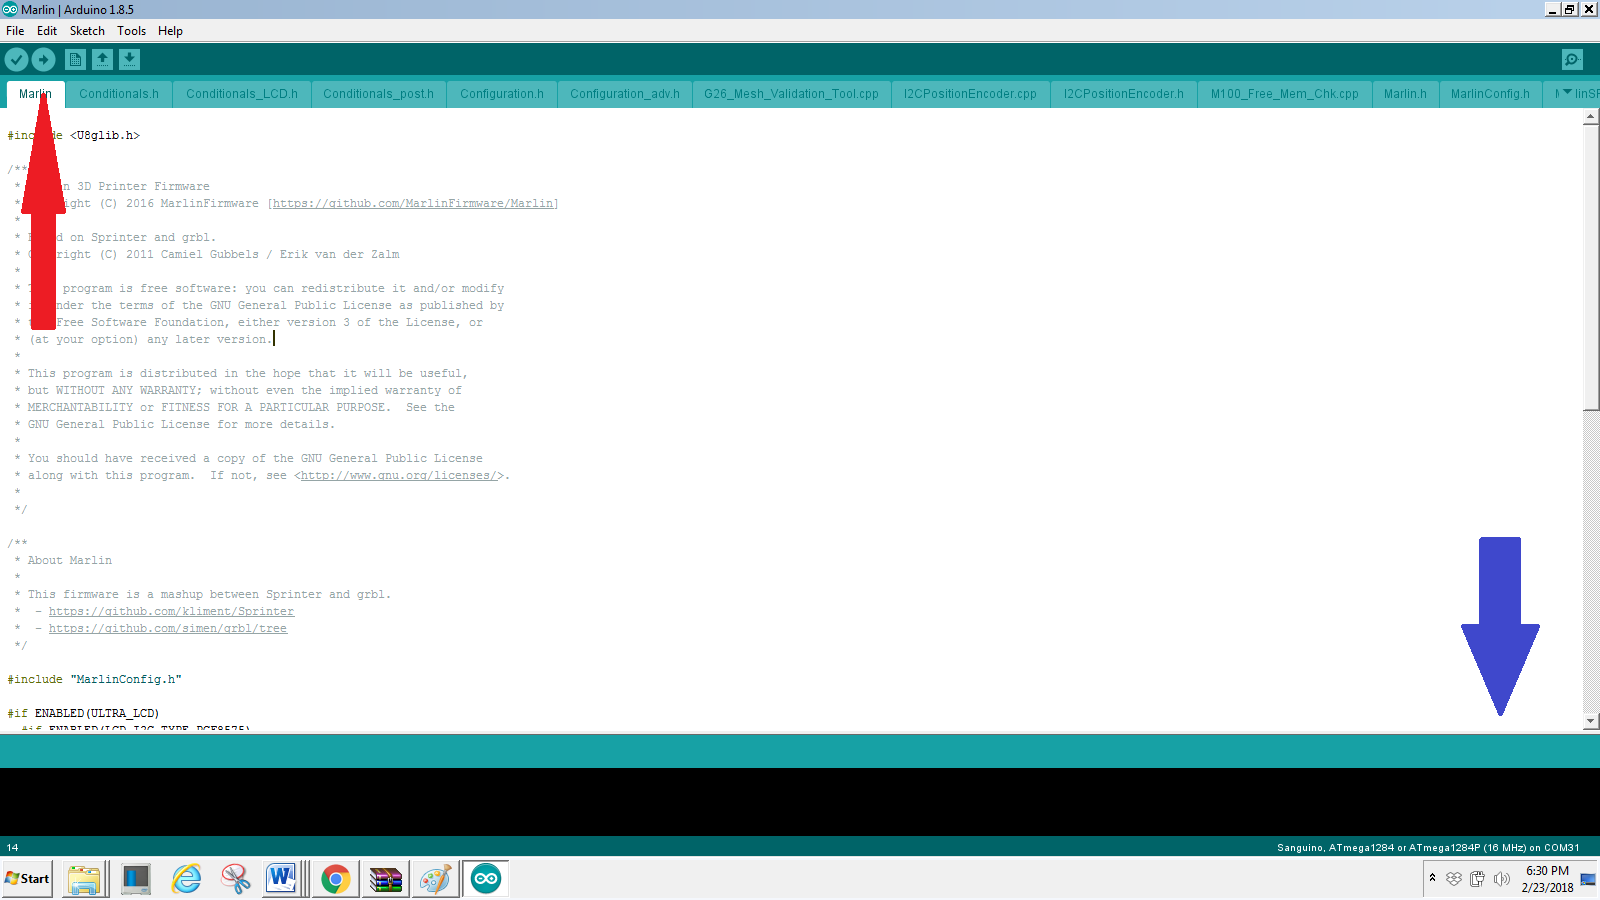
  1. Locate and open the file you saved, then run Arduino exe. See red arrow.


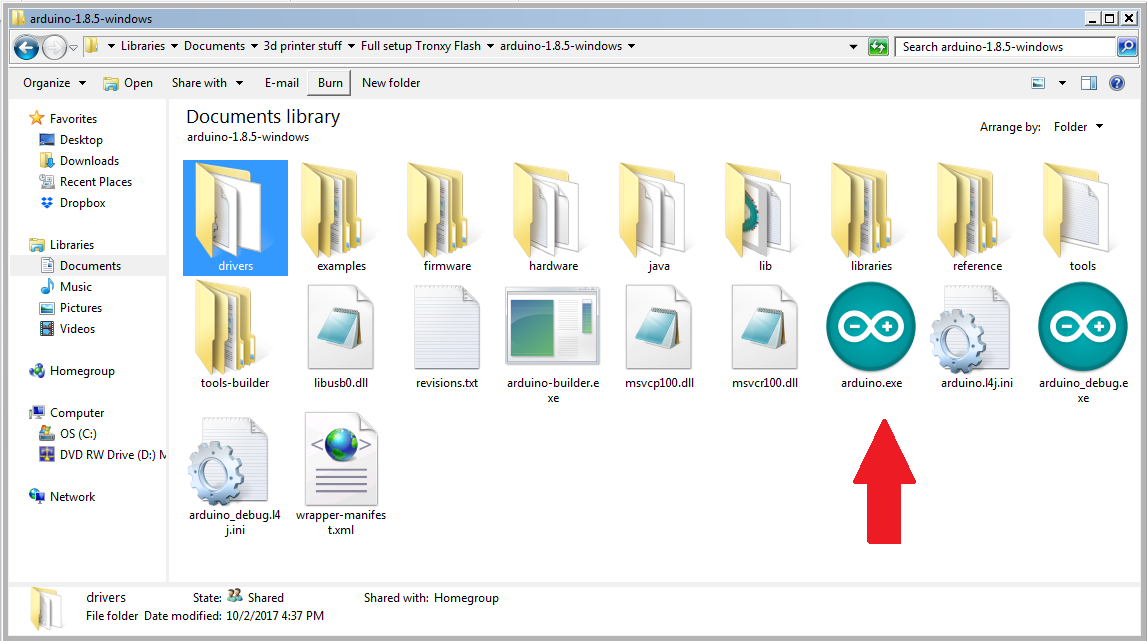
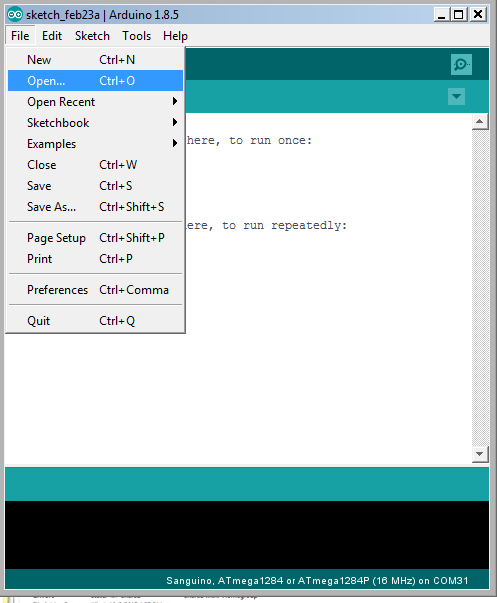
  1. Once Arduino loads open the marlin INO file for the X5S firmware.  (file/open/marlin/ X5S M1.1.8/marlin.ino ) To make this easier I limit the files I see to file type INO (see pic for detail).   If your running windows 10 you might have to find the file by going to  File/ open/ portable/ sketchbook/ marline/ X5s m1.1.8/ marlin.ino. click open Red arrow again


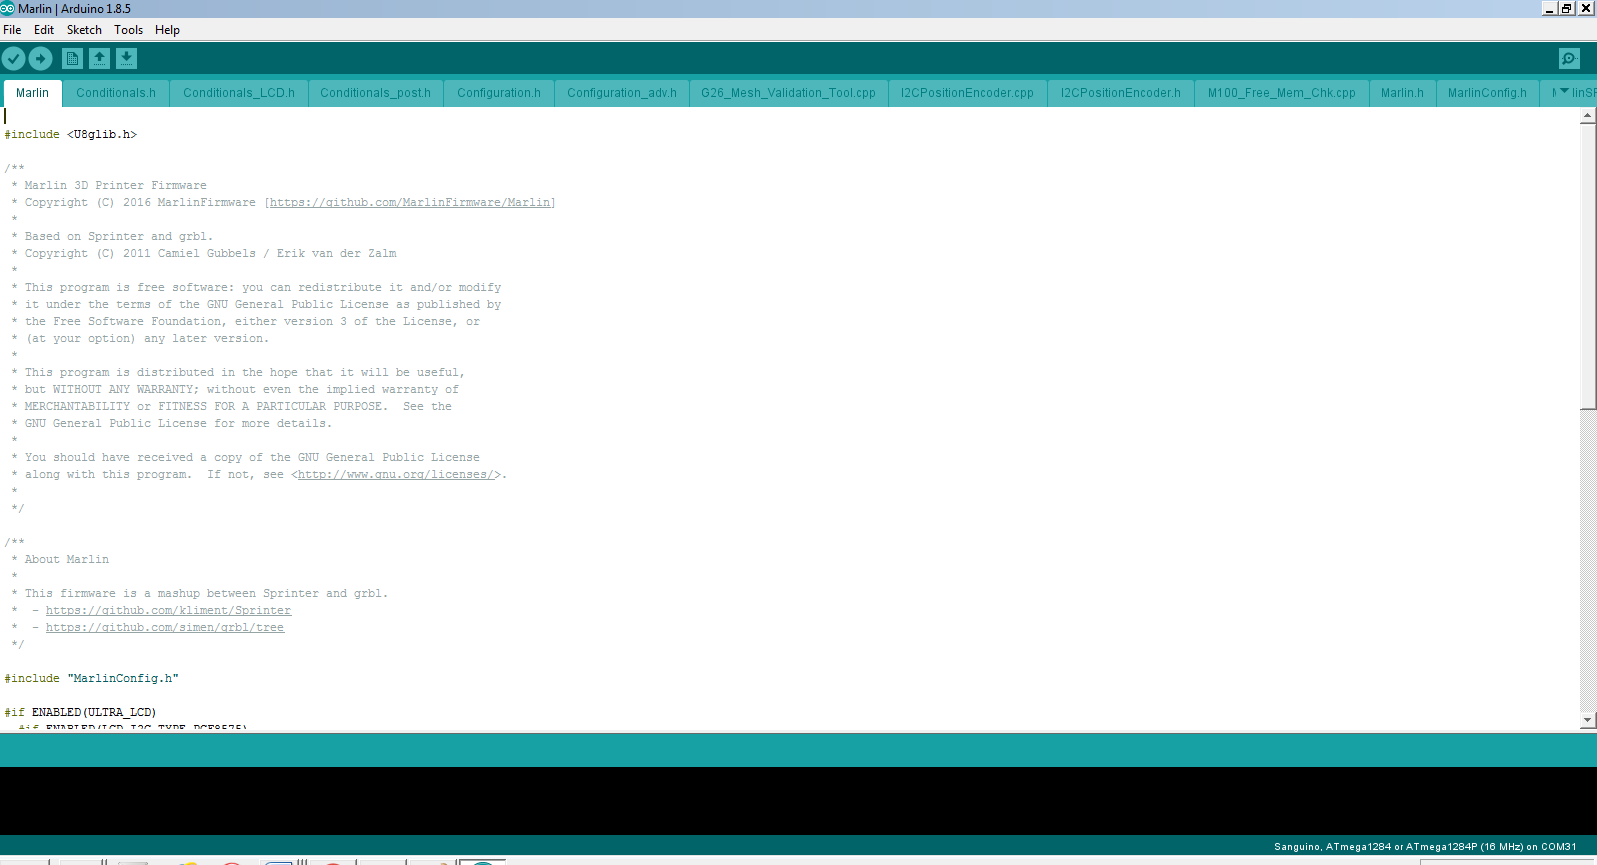
  1. Close first window of Aurduino, turn front one full screen.


  1. Plug in the USB cable and control board. The control board can be left fully installed in the printer just do not have the power on to it just in case. You might have to download and install drivers if windows does not install them on its own.

            Drivers can be downloaded here

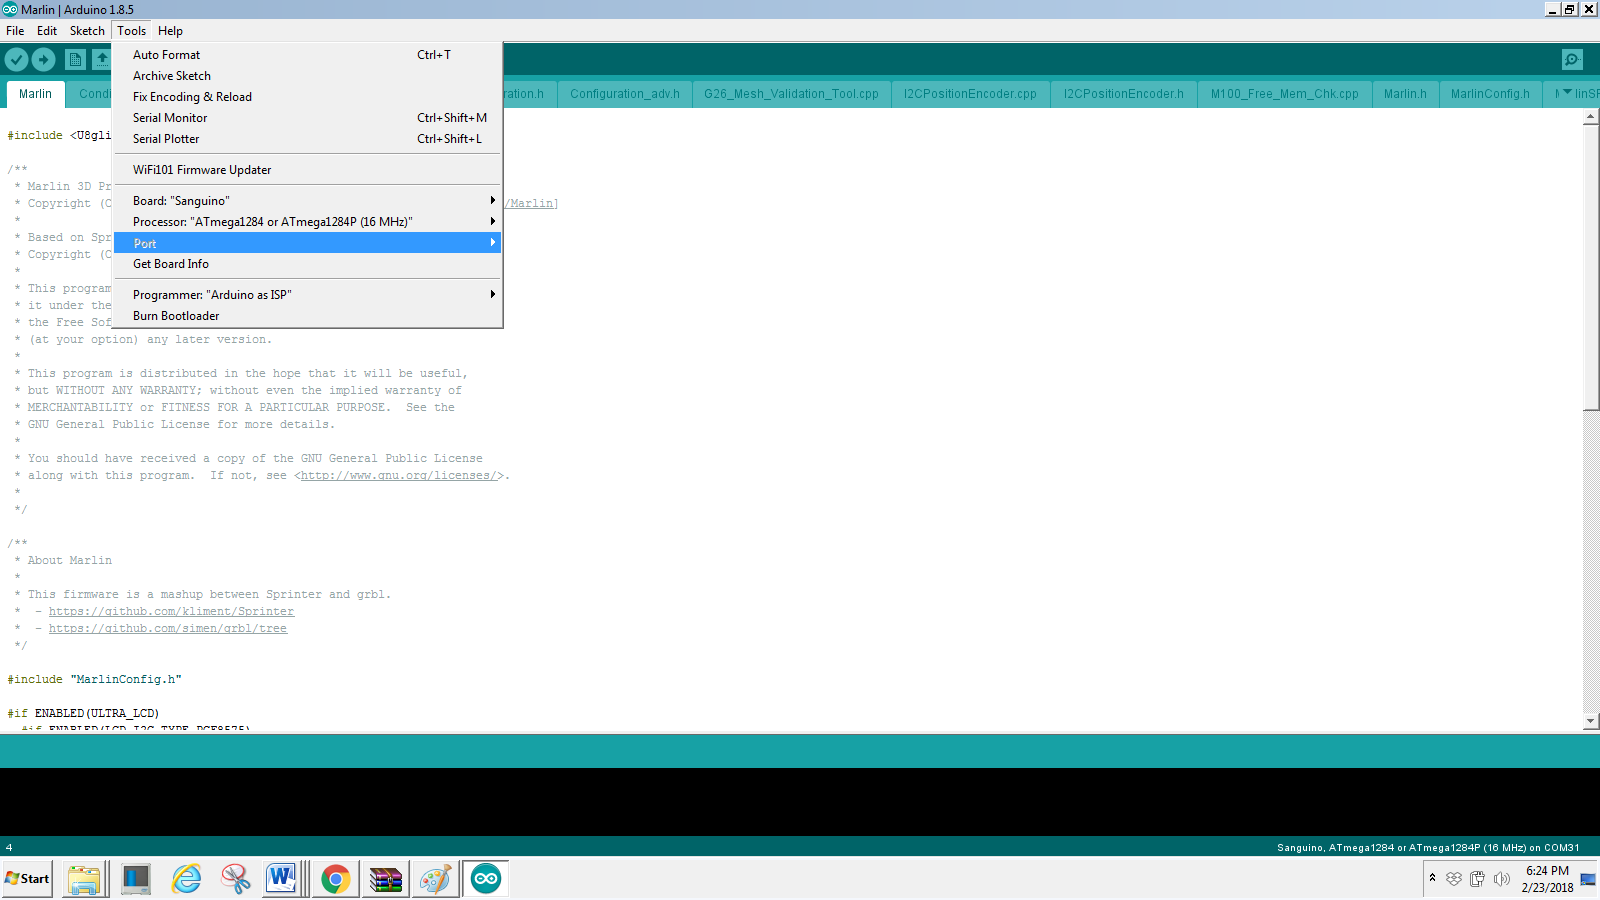
  1. Check make sure board is set to “Sanguino” and processor is set to “ATmega 1284 or ATmega1284P (16MHz)”  then Set the Port to the one that the control board it using.


  1. Upload the new firmware (red arrow)…..Wait for it to compile and then it will upload Blue arrow is where it will show compiling and uploading and complete.


    10. Enjoy


Thank you for reading and a big thanks to Alexander Ludwig for giving me his old factory board, because I had already added bootloader to mine.

How to Install a Post Processing Scripts in Cura 3...
Power Supply Fan Replacement

Related Posts


Comments 62

ken sterdan on Friday, 09 March 2018 10:59

Scott, thanks for the firmware file, As you know i blew up the controller on my X5 burnt out the Z axis end-stop somehow.thought the board was dead used your tools firmware brought the board back to life less the Z end-stop. the board cant be repaired but everything else works on it. Also programmed a Anet8 board just to see if it would work and then did the board on my Tevo Tarantula, took a couple hours of tinkering with the settings with help from a friend but it works. Again nice piece of work on that file keep it up its a good thing we have access to people like you in this endeavor to learn how to use the printers.

Scott, thanks for the firmware file, As you know i blew up the controller on my X5 burnt out the Z axis end-stop somehow.thought the board was dead used your tools firmware brought the board back to life less the Z end-stop. the board cant be repaired but everything else works on it. Also programmed a Anet8 board just to see if it would work and then did the board on my Tevo Tarantula, took a couple hours of tinkering with the settings with help from a friend but it works. Again nice piece of work on that file keep it up its a good thing we have access to people like you in this endeavor to learn how to use the printers.
Guest - unnefer on Sunday, 25 March 2018 10:41

OEM firmware LCD was not great, but the LCD with this firmware is glitchy looking:

https://preview.ibb.co/fLdYx7/x5s_1_1_8_lcd_glitch.jpg

Is there a possible fix I can do in configuration somewhere?

OEM firmware LCD was not great, but the LCD with this firmware is glitchy looking: [img]https://preview.ibb.co/fLdYx7/x5s_1_1_8_lcd_glitch.jpg[/img] Is there a possible fix I can do in configuration somewhere?
Scott Worthington on Sunday, 25 March 2018 12:30

Well I personally have flashed at least 9 control board with this exact firmware and have never seen this issue that looks like a screen issue to me. You might want to check all the solder joints on the back to make sure they are good. Because to me that's more than likely hardware !s it's not a proble. On the hundreds of others screen all the images you see of my X5S screw are this exact firmware including in my videos and no issues like that. Also check cable connections

Well I personally have flashed at least 9 control board with this exact firmware and have never seen this issue that looks like a screen issue to me. You might want to check all the solder joints on the back to make sure they are good. Because to me that's more than likely hardware !s it's not a proble. On the hundreds of others screen all the images you see of my X5S screw are this exact firmware including in my videos and no issues like that. Also check cable connections
Guest - Keith on Wednesday, 28 March 2018 15:26

Hi, I have been trying to get my X5S to print, period. SD card didn't work, won't do it from USB either. Trying to use Cura, since I'm more familiar with it. Cause I tried Repetier Host and it didn't work either. Tried Cura with and w/o Ponterface. Nothing is working. I am trying to do this and can't get to where I can change the board to the Sanguino board, it's not listed for me. Any help would be greatly appreciated. This isn't my first kit 3d printer, but I am a bit computer ignorant on this kind of thing. I apologize for all the questions and inquiries.

Hi, I have been trying to get my X5S to print, period. SD card didn't work, won't do it from USB either. Trying to use Cura, since I'm more familiar with it. Cause I tried Repetier Host and it didn't work either. Tried Cura with and w/o Ponterface. Nothing is working. I am trying to do this and can't get to where I can change the board to the Sanguino board, it's not listed for me. Any help would be greatly appreciated. This isn't my first kit 3d printer, but I am a bit computer ignorant on this kind of thing. I apologize for all the questions and inquiries.
Scott Worthington on Wednesday, 28 March 2018 15:35

Keith would you do me a favor and post the problem in the forum part of the site it will make it easier to track and reply to. But im pretty sure your problem is your baud rate is not set correctly

Keith would you do me a favor and post the problem in the forum part of the site it will make it easier to track and reply to. But im pretty sure your problem is your baud rate is not set correctly
Guest - Keith on Wednesday, 28 March 2018 16:09

Yes, I will do that. I did change the baud rate to 115200 and it didn't help either, but I did post just now in the Facebook forum. Thank you for the quick reply.

Yes, I will do that. I did change the baud rate to 115200 and it didn't help either, but I did post just now in the Facebook forum. Thank you for the quick reply.
Scott Worthington on Wednesday, 28 March 2018 16:32

Cool well the factory control board none flashed I believe is at 57600 or is it 56700... always mixing up numbers.

Cool well the factory control board none flashed I believe is at 57600 or is it 56700... always mixing up numbers.
Guest - Sunny Yun on Wednesday, 04 April 2018 02:13

Thank you, sir!!!

Thank you, sir!!!
Guest - barry on Saturday, 14 April 2018 17:23

Thanks for this Tutorial. I got also the prob with the Temp !!! Glad you modified it !

Thanks for this Tutorial. I got also the prob with the Temp !!! Glad you modified it !:)
Scott Worthington on Saturday, 14 April 2018 17:31

Not a problem I just find it odd it needed modified at all because the first version is exactly what's on my printer

Not a problem I just find it odd it needed modified at all because the first version is exactly what's on my printer
Guest - Jean-No on Sunday, 15 April 2018 17:49

Hi,

Like a few, I had the thermal error. So I tried the extended temp time firmware, but the result was identical: after some time of printing, it stops suddenly. Exact same location each time !

In one of your comment, you said "Not a problem at all I think I went 80 or 90 and left it at 2 but another person did 80 and 1..."
How can I do this ? I mean what file do I have to modify ?

Thanks a lot

PS: also your tutorial was perfect !

Hi, Like a few, I had the thermal error. So I tried the extended temp time firmware, but the result was identical: after some time of printing, it stops suddenly. Exact same location each time ! In one of your comment, you said "Not a problem at all I think I went 80 or 90 and left it at 2 but another person did 80 and 1..." How can I do this ? I mean what file do I have to modify ? Thanks a lot PS: also your tutorial was perfect !
Scott Worthington on Sunday, 15 April 2018 18:04

It's in the advanced h file top part if I recall correctly. You might want to adjust the hotend and bed both most of the time it seams like it's the hotend actually. I would suggest turning you pay voltage up as well as it will also help. Mine is at 14.8v but base the voltage off of your bed resistance

It's in the advanced h file top part if I recall correctly. You might want to adjust the hotend and bed both most of the time it seams like it's the hotend actually. I would suggest turning you pay voltage up as well as it will also help. Mine is at 14.8v but base the voltage off of your bed resistance
Jean-Noël Bouwyn on Sunday, 15 April 2018 19:22

IT WORKED

Thanks dude. You're the dude, dude.

IT WORKED Thanks dude. You're the dude, dude.
Guest - Tremayne on Sunday, 22 April 2018 05:26

keep getting this error, I don't know what ive done differently from the guide


Arduino: 1.8.5 (Windows 10), Board: "Sanguino, ATmega1284 or ATmega1284P (16 MHz)"

Archiving built core (caching) in: C:\Users\Tremayne\AppData\Local\Temp\arduino_cache_307128\core\core_Lauszus-Sanguino-360282f_avr_sanguino_cpu_atmega1284p_7d771314ff73fe29b6ac2e82c936a197.a
Sketch uses 117946 bytes (90%) of program storage space. Maximum is 130048 bytes.
Global variables use 4561 bytes (27%) of dynamic memory, leaving 11823 bytes for local variables. Maximum is 16384 bytes.
avrdude: stk500_recv(): programmer is not responding
avrdude: stk500_getsync() attempt 1 of 10: not in sync: resp=0x9f
avrdude: stk500_recv(): programmer is not responding
avrdude: stk500_getsync() attempt 2 of 10: not in sync: resp=0x9f
avrdude: stk500_recv(): programmer is not responding
avrdude: stk500_getsync() attempt 3 of 10: not in sync: resp=0x9f
avrdude: stk500_recv(): programmer is not responding
avrdude: stk500_getsync() attempt 4 of 10: not in sync: resp=0x9f
avrdude: stk500_recv(): programmer is not responding
avrdude: stk500_getsync() attempt 5 of 10: not in sync: resp=0x9f
avrdude: stk500_recv(): programmer is not responding
avrdude: stk500_getsync() attempt 6 of 10: not in sync: resp=0x9f
avrdude: stk500_recv(): programmer is not responding
avrdude: stk500_getsync() attempt 7 of 10: not in sync: resp=0x9f
avrdude: stk500_recv(): programmer is not responding
avrdude: stk500_getsync() attempt 8 of 10: not in sync: resp=0x9f
avrdude: stk500_recv(): programmer is not responding
avrdude: stk500_getsync() attempt 9 of 10: not in sync: resp=0x9f
avrdude: stk500_recv(): programmer is not responding
avrdude: stk500_getsync() attempt 10 of 10: not in sync: resp=0x9f
Problem uploading to board. See http://www.arduino.cc/en/Guide/Troubleshooting#upload for suggestions.

This report would have more information with
"Show verbose output during compilation"
option enabled in File -> Preferences.

keep getting this error, I don't know what ive done differently from the guide Arduino: 1.8.5 (Windows 10), Board: "Sanguino, ATmega1284 or ATmega1284P (16 MHz)" Archiving built core (caching) in: C:\Users\Tremayne\AppData\Local\Temp\arduino_cache_307128\core\core_Lauszus-Sanguino-360282f_avr_sanguino_cpu_atmega1284p_7d771314ff73fe29b6ac2e82c936a197.a Sketch uses 117946 bytes (90%) of program storage space. Maximum is 130048 bytes. Global variables use 4561 bytes (27%) of dynamic memory, leaving 11823 bytes for local variables. Maximum is 16384 bytes. avrdude: stk500_recv(): programmer is not responding avrdude: stk500_getsync() attempt 1 of 10: not in sync: resp=0x9f avrdude: stk500_recv(): programmer is not responding avrdude: stk500_getsync() attempt 2 of 10: not in sync: resp=0x9f avrdude: stk500_recv(): programmer is not responding avrdude: stk500_getsync() attempt 3 of 10: not in sync: resp=0x9f avrdude: stk500_recv(): programmer is not responding avrdude: stk500_getsync() attempt 4 of 10: not in sync: resp=0x9f avrdude: stk500_recv(): programmer is not responding avrdude: stk500_getsync() attempt 5 of 10: not in sync: resp=0x9f avrdude: stk500_recv(): programmer is not responding avrdude: stk500_getsync() attempt 6 of 10: not in sync: resp=0x9f avrdude: stk500_recv(): programmer is not responding avrdude: stk500_getsync() attempt 7 of 10: not in sync: resp=0x9f avrdude: stk500_recv(): programmer is not responding avrdude: stk500_getsync() attempt 8 of 10: not in sync: resp=0x9f avrdude: stk500_recv(): programmer is not responding avrdude: stk500_getsync() attempt 9 of 10: not in sync: resp=0x9f avrdude: stk500_recv(): programmer is not responding avrdude: stk500_getsync() attempt 10 of 10: not in sync: resp=0x9f Problem uploading to board. See http://www.arduino.cc/en/Guide/Troubleshooting#upload for suggestions. This report would have more information with "Show verbose output during compilation" option enabled in File -> Preferences.
Scott Worthington on Sunday, 22 April 2018 13:40

Have you red through all the comments as Well? Did you have arduino installed before if so make sure to uninstall it . I have seen people get errors when using Windows 10 I don't have 10 and never got the error with 7. Might try right click and run as admin ...

Have you red through all the comments as Well? Did you have arduino installed before if so make sure to uninstall it . I have seen people get errors when using Windows 10 I don't have 10 and never got the error with 7. Might try right click and run as admin ...
Guest - Al on Tuesday, 24 April 2018 13:13

Scott,

Did you actually branch your firmware off of a older Marlin?

Comparing the code it seemed like yours may have been branched from 1.1.6 as some of the changes in 1.1.8 seemed to be missing

Scott, Did you actually branch your firmware off of a older Marlin? Comparing the code it seemed like yours may have been branched from 1.1.6 as some of the changes in 1.1.8 seemed to be missing
Scott Worthington on Tuesday, 24 April 2018 13:34

Not my firmware I downloaded and edited on that was posted the edits I did where like acceleration and jerk setting just basic changes. If you have a more updated version I would b happy to change the upload to it once I have tried it. Just know the current version already takes 98% of the memory on the factory board. So that might be why it's cut down a little.

Not my firmware I downloaded and edited on that was posted the edits I did where like acceleration and jerk setting just basic changes. If you have a more updated version I would b happy to change the upload to it once I have tried it. Just know the current version already takes 98% of the memory on the factory board. So that might be why it's cut down a little.
Guest - Al on Thursday, 26 April 2018 13:06

Scott,

I am working on a updated version which I am still tuning. I will share when it is ready.

In the mean time I was comparing the firmware in your main zip with the fixed heater firmware you released. I checked this twice before asking as I assume it was me making a error, but both firmware appear completely identical (the one in the 165mb zip, and the one in the separate fix you have for download), so I do not see any way the 2nd firmware could be fixing anything for anyone unless I am missing something. Possibly you uploaded the wrong file there? Anyway if you could double check and let me know if I am making a mistake.

Thanks.

Scott, I am working on a updated version which I am still tuning. I will share when it is ready. In the mean time I was comparing the firmware in your main zip with the fixed heater firmware you released. I checked this twice before asking as I assume it was me making a error, but both firmware appear completely identical (the one in the 165mb zip, and the one in the separate fix you have for download), so I do not see any way the 2nd firmware could be fixing anything for anyone unless I am missing something. Possibly you uploaded the wrong file there? Anyway if you could double check and let me know if I am making a mistake. Thanks.
Scott Worthington on Thursday, 26 April 2018 13:29

I'll check to be sure... but I believe it's the correct one...

I'll check to be sure... but I believe it's the correct one...
Guest - Al on Thursday, 26 April 2018 17:15

Thanks! Let me know if you see the same thing, or if I am just crazy and missing something from my compares.

Thank you.

Thanks! Let me know if you see the same thing, or if I am just crazy and missing something from my compares. Thank you.
Already Registered? Login Here
Guest
Friday, 19 April 2024

To keep the site live and make improvements Please consider Donating. Thank you for your donation.